 The Rosemarys: BEFORE Re-Potting.
 As the days grow colder for most of us, preparations must be made to bring all your favorite plants that have been thriving in containers on your deck, patio, or what-have-you. The most important task that must be done is to re-pot those plants that have outgrown their little plastic/terracotta/ceramic britches and get them comfy cozy for their winter residence inside the home.
I have several plants that were desperately in need of re-potting; namely, my "infamous" $2 rosemary plant, which is doing tremendously well these days and has now been re-potted three times since I rescued it from the clearance table at Russell's.
I have several plants that were desperately in need of re-potting; namely, my "infamous" $2 rosemary plant, which is doing tremendously well these days and has now been re-potted three times since I rescued it from the clearance table at Russell's.
Some of you may be wondering, "So, Dirt Momma...WHY are you posting yet ANOTHER tutorial on re-potting? Didn't you do that LAST YEAR???" The reason is that I wanted to show you a better step-by-step guide that you can use not just for rosemary plants, but for ALL your plants that may be seriously pot-bound and practically choking themselves to death.
When re-potting, remember to use a larger pot than the one that the plant was in previously.
So here it goes...
Here you see both the $2 rosemary and the one that I had purchased this past spring at Trader Joe's BEFORE I re-potted them. Now this is what you do:
When re-potting, remember to use a larger pot than the one that the plant was in previously.
So here it goes...
Here you see both the $2 rosemary and the one that I had purchased this past spring at Trader Joe's BEFORE I re-potted them. Now this is what you do:
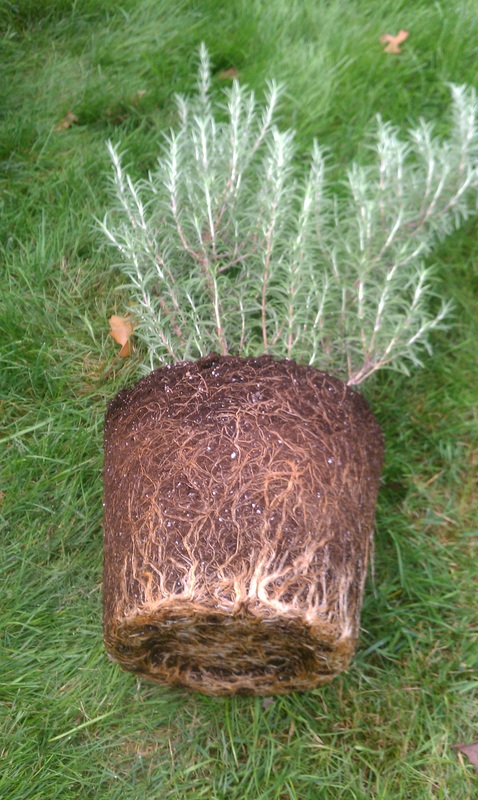 Fig 1. - Remove plant from pot.
 Step 1. Hold the pot upside-down at a bit of an angle and do your best to carefully tap on the outside of the pot to loosen the plant for removal. If the roots have escaped through the drainage holes at the bottom of the pot, you will need to cut those off first with a hand pruner (see Fig. 1).
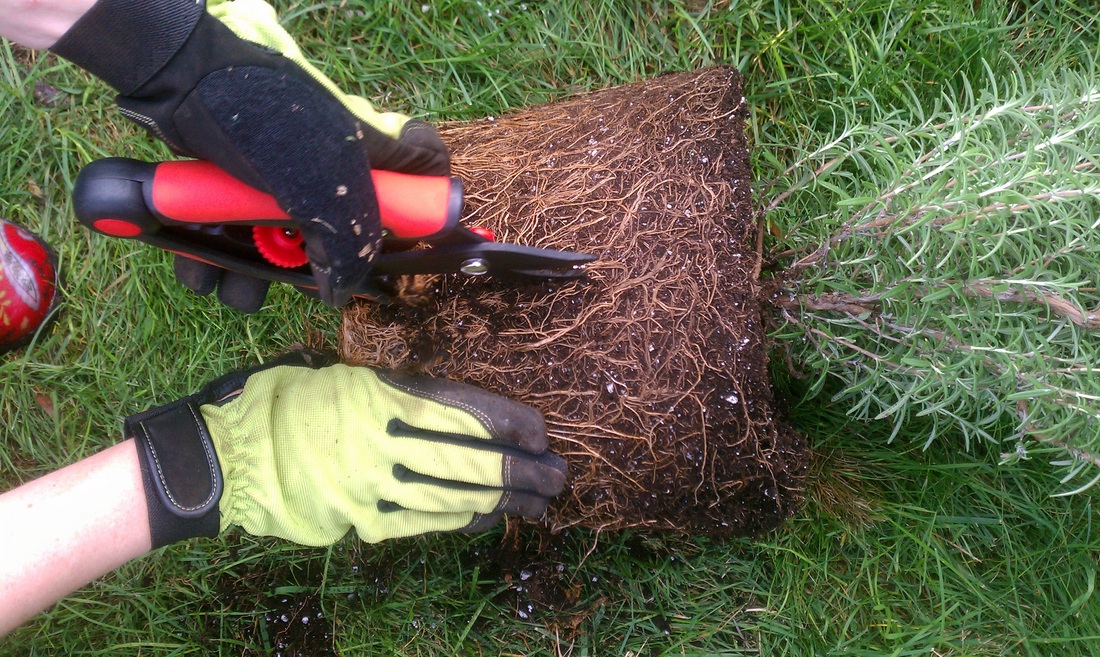 Fig. 2 - Cut away the excess root.
 Step 2. After removing the plant from the pot, take the pruner and trim off the roots on the bottom and cut up the outer sides of the root system (see Fig. 2). You can safely cut back about 1/4-1/3 of the root system and the plant will not go into shock.
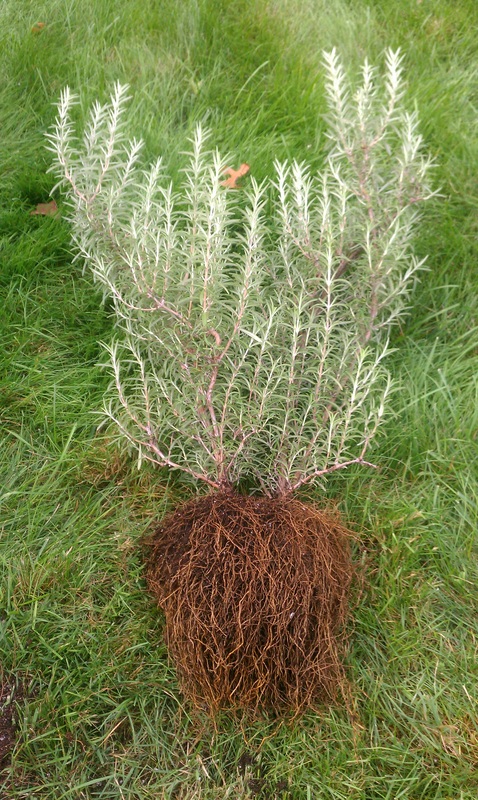 Fig. 3 - Shake out root system.
 Step 3. Carefully tap on the root system with a hand rake or your hand to shake it out and allow air to pass through (see Fig. 3).
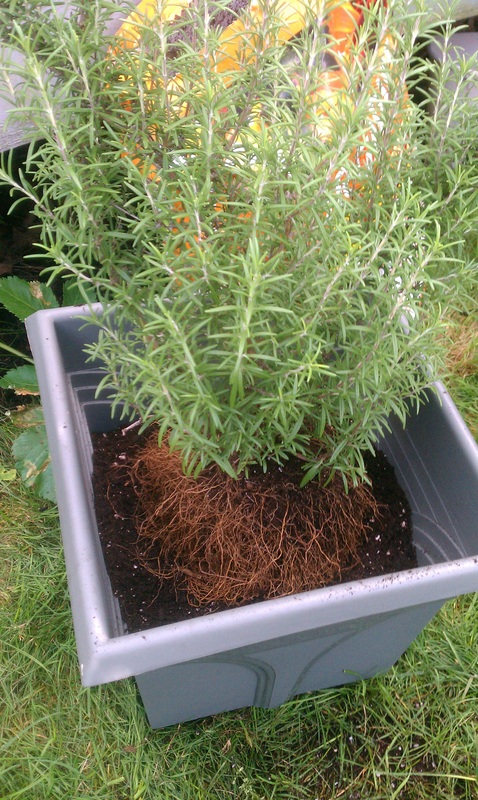 Fig. 4 - Place plant on top of soil in pot.
 Step 4. Fill the pot about halfway or so with organic potting soil and place the plant on top (see Fig. 4). If possible, mix some sand with the potting soil to allow for better drainage.
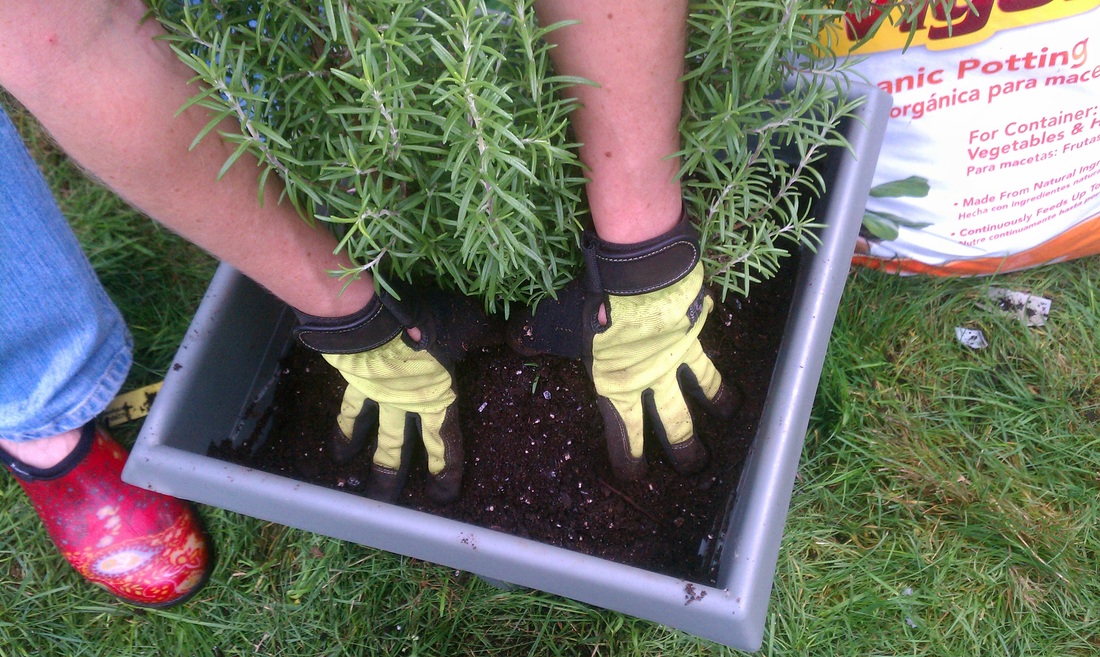 Fig. 5 - Add soil around plant.
 Step 5. Add soil around the plant. Carefully pat down the soil around the plant as if you were "tucking it into bed" (see Fig. 5). Then continue to add soil to about 1" from the top of the pot.
Step 6. Water newly-potted plant with a mix of liquid seaweed and water.
Step 6. Water newly-potted plant with a mix of liquid seaweed and water.
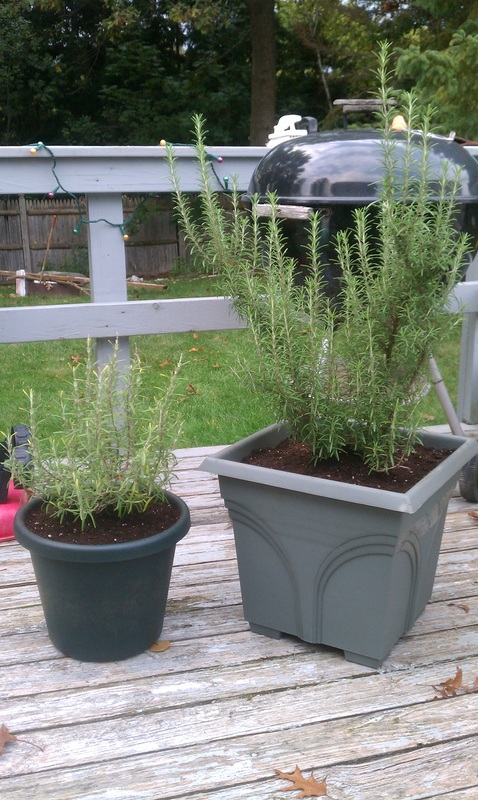
The Rosemarys: AFTER Re-potting.
There you have it! This process should be done at least once a year with your plants to encourage healthy growth. Some plants may require more frequent re-pottings, depending on how fast they grow.
If you enjoyed what you've read and feel others could benefit from this information, please do share the link to this post on your favorite social media site.
Feel free to post comments and share any tips on this subject.
You can also sign up for the Dirt Momma newsletter to receive updates on what I've been digging and learn a few tips and tips along the way! Thanks so much!
Until next time...
Happy digging!

 RSS Feed