Ahhhhh, garlic! With a variety of uses--both culinary and medicinal--it's no wonder that it is such a popular plant to grow!
The garlic plant (Allium sativum), which produces a bulb, is a member of the lily family, just like shallots, onions, and chives. To learn more about garlic, check out this article on Wikipedia.
Here in New England, the best time to plant is around October/November, before the hard frost sets in. In this article, I'm going to demonstrate how easy it is to plant and grow your own garlic. Check it out...
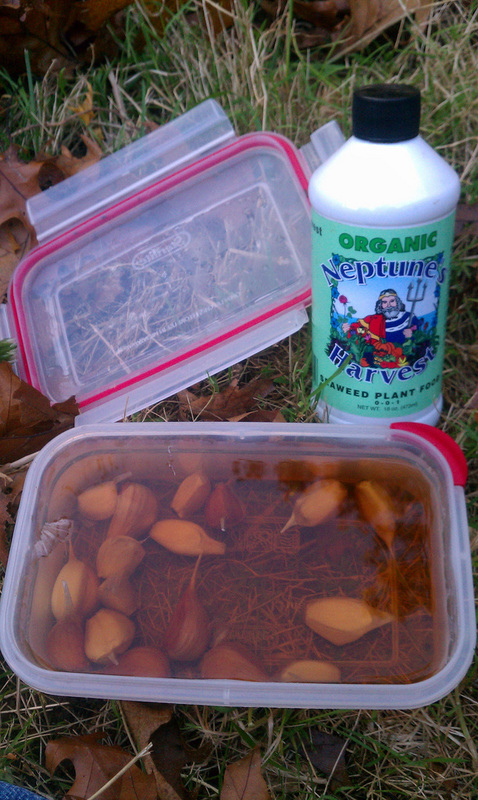 Step 1. Soak garlic in a mix of water
and liquid seaweed fertilizer.
Step 1. Soak garlic cloves for several hours (preferably overnight) in a water/liquid seaweed fertilizer mix. I usually add about 1/2 -1 Tbs of liquid seaweed to 4 cups of water.
***While the garlic cloves are soaking, prepare the garden bed for planting; making sure weeds are removed, soil is amended with compost, etc.***
***While the garlic cloves are soaking, prepare the garden bed for planting; making sure weeds are removed, soil is amended with compost, etc.***
 Step 2. Lay out cloves to ensure proper spacing.
 Step 2. Once the soil has been prepared, lay out the cloves in rows prior to planting in order to determine proper spacing.
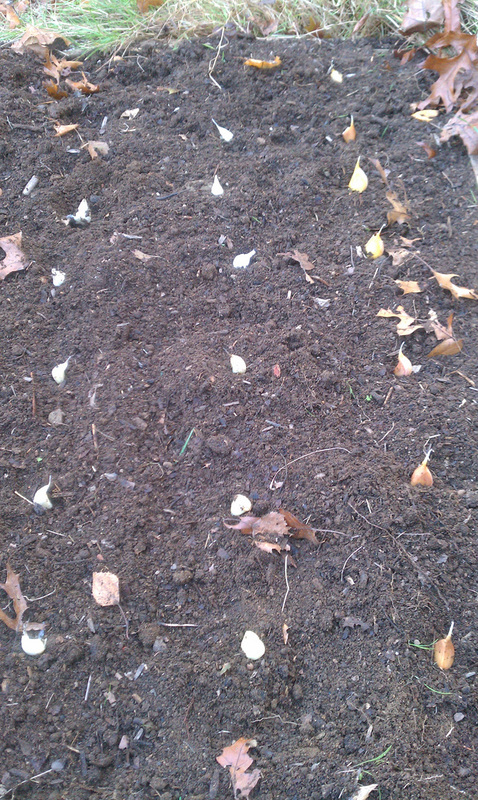
 Step 3. Place clove in 4-5" deep hole.
 Step 3. Dig a hole, about 4-5 inches deep, and place clove in with point facing up and cover with soil.
 Step 4. Cover newly-planted garlic
with a thick layer of mulch.
Step 4. Once all the cloves have been planted and covered with soil, add a thick layer of chopped leaf mulch to prevent weeds. This mulch will decompose and provide some nutrients to the garlic during the growing process.
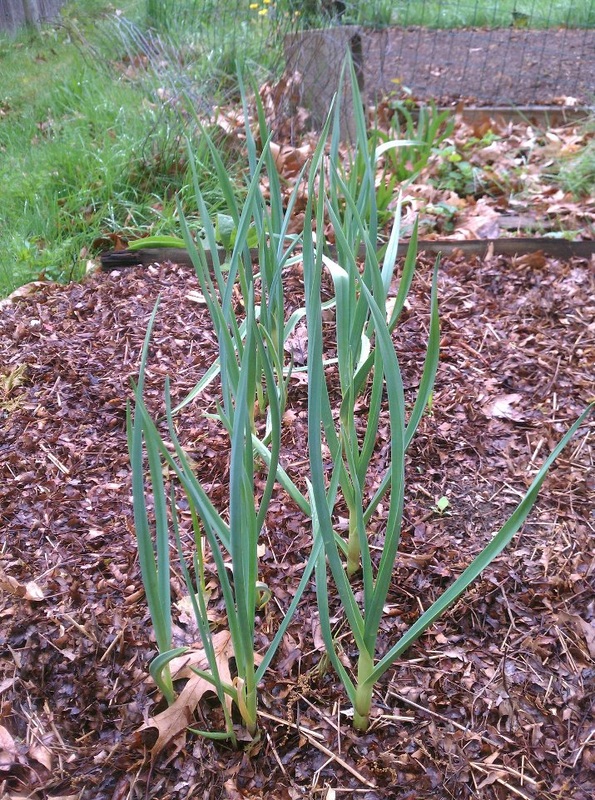 Softneck garlic (Red Tosh)
growing in early spring.
By the time winter arrives, you may see new shoots of garlic sprouting out of the ground. These will go dormant during the winter season, only to start sprouting again once the frost has melted and the days get warmer in the spring.
By late spring/early summer, you will start to see scapes on the hardneck varieties. These can be cut off and cooked, as they have a light, garlicky flavor. There's a great pesto recipe on the Green Mountain Garlic website. Cutting off the scapes will also ensure that the plants energy gets diverted to growing the garlic head.
By late spring/early summer, you will start to see scapes on the hardneck varieties. These can be cut off and cooked, as they have a light, garlicky flavor. There's a great pesto recipe on the Green Mountain Garlic website. Cutting off the scapes will also ensure that the plants energy gets diverted to growing the garlic head.
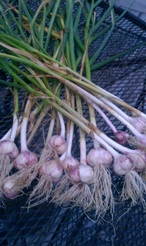
 Successful hardneck garlic (Belarus) harvest.
 By around July/August, the garlic will be ready to harvest. When the lower part of the leaves start to dry and turn brown, then it is time to dig up the garlic. If you dig them up early, the heads will be too small, but if you wait too long, the heads won't store very well.
Once you've harvested your garlic, you will need to let them cure by placing them spread out in a cool, dry location for a few weeks to allow the heads and leaves to dry. Once cured, then you can trim the leaves off of the heads and store them in a cool, dry place (sense a theme here?)--I keep mine in netting bags that I've saved from potatoes and onions that were purchased at the store.
Softneck varieties can be braided and hung up in (you guessed it!) a cool. dry place for easy access to fresh garlic. Click here to learn how to braid garlic.
You may want to set aside a few heads for planting in the fall. Be sure to choose the largest heads, as the size of the garlic bulb determines the size of the plant.
So that is pretty much how to grow garlic. Try it for yourself--you'll be glad you did! Feel free to share your experiences in the comments section below. I'd love to hear from you!
If you enjoyed what you've read and feel others could benefit from this information, please do share the link to this post on your favorite social media site.
While you're here, you can sign up for the Dirt Momma newsletter to receive updates on what's been going on in Dirt Momma's garden and kitchen, and learn a few tips and tips along the way! Thanks so much! :-)
Until next time...
Happy digging!

 RSS Feed